Checklist
Let's publish your TurboStarter app to stores!
When you're ready to publish your TurboStarter app to stores, follow this checklist.
This process may take a few hours and some trial and error, so buckle up - you're almost there!
Create database instance
Why it's necessary?
A production-ready database instance is essential for storing your application's data securely and reliably in the cloud. PostgreSQL is the recommended database for TurboStarter due to its robustness, features, and wide support.
How to do it?
You have several options for hosting your PostgreSQL database:
- Supabase - Provides a fully managed Postgres database with additional features
- Vercel Postgres - Serverless SQL database optimized for Vercel deployments
- Neon - Serverless Postgres with automatic scaling
- Turso - Edge database built on libSQL with global replication
- DigitalOcean - Managed database clusters with automated failover
Choose a provider based on your needs for:
- Pricing and budget
- Geographic region availability
- Scaling requirements
- Additional features (backups, monitoring, etc.)
Migrate database
Why it's necessary?
Pushing database migrations ensures that your database schema in the remote database instance is configured to match TurboStarter's requirements. This step is crucial for the application to function correctly.
How to do it?
You basically have two possibilities of doing a migration:
TurboStarter comes with predefined Github Action to handle database migrations. You can find its definition in the .github/workflows/publish-db.yml file.
What you need to do is to set your DATABASE_URL as a secret for your Github repository.
Then, you can run the workflow which will publish the database schema to your remote database instance.
You can also run your migrations locally, although this is not recommended for production.
To do so, set the DATABASE_URL environment variable to your database URL (that comes from your database provider) in .env.local file and run the following command:
pnpm with-env pnpm --filter @turbostarter/db db:migrateThis command will run the migrations and apply them to your remote database.
(Optional) Set up Firebase project
Why it's necessary?
Setting up a Firebase project is optional, and depends on which features your app is using. For example, if you want to use Analytics with Google Analytics, setting up a Firebase project is required.
How to do it?
Please refer to the Firebase project section on how to set up and configure your Firebase project.
Set up web backend API
Why it's necessary?
Setting up the backend is necessary to have a place to store your data and to have other features work properly (e.g. authentication, billing or storage).
How to do it?
Please refer to the web deployment checklist on how to set up and deploy the web app backend to production.
Environment variables
Why it's necessary?
Setting the correct environment variables is essential for the application to function correctly. These variables include API keys, database URLs, and other configuration details required for your app to connect to various services.
How to do it?
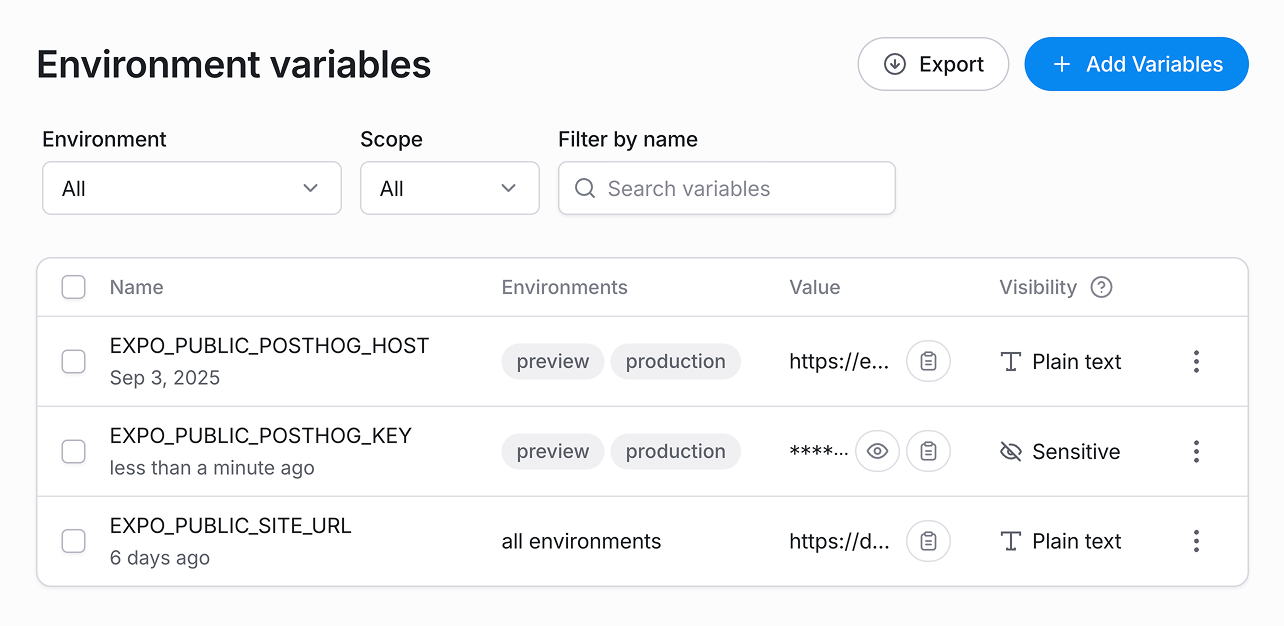
Use our .env.example files to get the correct environment variables for your project. Then add them to your project on the EAS platform for correct profile and environment:

Alternatively, you can add them to your eas.json file under correct profile.
{
  "profiles": {
    "base": {
      "env": {
        "EXPO_PUBLIC_DEFAULT_LOCALE": "en",
        "EXPO_PUBLIC_AUTH_PASSWORD": "true",
        "EXPO_PUBLIC_AUTH_MAGIC_LINK": "false",
        "EXPO_PUBLIC_THEME_MODE": "system",
        "EXPO_PUBLIC_THEME_COLOR": "orange"
      }
    },
    "production": {
      "extends": "base",
      "autoIncrement": true,
      "env": {
        "APP_ENV": "production",
        "EXPO_PUBLIC_SITE_URL": "https://www.turbostarter.dev",
      }
    }
  }
}
Build your app
Prerequisite: EAS account
Building your app requires an EAS account and project. If you don't have one, you can create it by following the steps here.
Why it's necessary?
Building your app is necessary to create a standalone application bundle that can be published to the stores.
How to do it?
You basically have two possibilities to build a bundle for your app:
TurboStarter comes with predefined Github Action to handle building your app on EAS. You can find its definition in the .github/workflows/publish-mobile.yml file.
What you need to do is to set your EXPO_TOKEN as a secret for your Github repository. You can obtain it from your EAS account, in the Access Tokens section.
Then, you can run the workflow which will build the app on EAS platform.
You can also run your build locally, although this is not recommended for production.
To do it, you'll need to have EAS CLI installed on your machine. You can install it by running the following command:
npm install -g eas-cliThen, run the following command to build your app with the production profile:
eas build --profile production --platform allThis will build the app for both platforms (iOS and Android) and output the results in your app folder.
Submit to stores
Why it's necessary?
Releasing your app to the stores is essential for making it accessible and discoverable by your users. This allows users to find, install, and trust your application through official channels.
How to do it?
We've prepared dedicated guides for each store that TurboStarter supports out-of-the-box, please refer to the following pages:
That's it! Your app is now live and accessible to your users, good job! 🎉
Other things to consider
- Optimize your store listings with compelling descriptions, keywords, screenshots and preview videos
- Remove placeholder content and replace with your final production content
- Update all visual branding including favicon, scheme, splash screen and app icons
How is this guide?
Last updated on